As a photographer, you’re always looking for ways to take your work to the next level. One of the easiest ways to do that is by using presets in Lightroom. Presets can save you time and help you achieve a consistent look and feel across your photos. But what happens when you want to share those presets with others or move them to a different computer? That’s where exporting comes in.
In this article, I’ll guide you through everything you need to know about exporting presets in Lightroom. We’ll cover the basics of presets, how to create and save them, and then dive into exporting and sharing them with others. Whether you’re a seasoned pro or just getting started, this guide will help you take your Lightroom game to the next level.
Exporting presets might not seem like the most exciting topic, but it’s an essential skill for any Lightroom user. By the end of this guide, you’ll be able to effortlessly share your presets with others, backup your presets, and move them to a different computer. So let’s dive in and get started!
Understanding Lightroom Presets

Definition of Presets
In Lightroom, a preset is a pre-determined combination of settings that you can apply to your images. It’s essentially a shortcut that allows you to achieve a specific look or feel with just a few clicks. Presets can include adjustments to exposure, color, contrast, tone curve, and more.
Types of Presets
There are two types of presets in Lightroom: default presets and custom presets. Default presets are included with the software and provide a great starting point for editing your images. Custom presets, on the other hand, are created by you or other users and can be tailored to your specific needs.
Benefits of Using Presets
Using presets in Lightroom can save you a ton of time and help you achieve a consistent look and feel across your images. Instead of manually adjusting every setting for each image, you can apply a preset and make minor tweaks as needed. Presets also allow you to experiment with different looks and styles without starting from scratch each time. Lastly, presets are a great way to share your editing style with others and even monetize your work through selling presets.
How to Create and Save a Preset in Lightroom

Have you ever spent hours editing a photo, only to realize you want all your photos to have the same look and feel? That’s where presets come in. With presets, you can save your editing settings and apply them to multiple photos with just one click. Creating and saving presets is easy, and in this section, I’ll guide you through the process step-by-step.
Step-by-Step Guide on Creating a Preset
- First, open Lightroom and select a photo you want to edit.
- Edit the photo using your desired settings, such as exposure, contrast, and color adjustments.
- Once you’re happy with the edits, go to the left-hand panel and navigate to the “Presets” tab.
- Click the “+” icon at the top of the panel to create a new preset.
- In the “New Develop Preset” dialog box, name your preset and select the settings you want to include in the preset.
- Click “Create” to save your preset.
Naming and Saving Presets
When it comes to naming and saving presets, there are a few things to keep in mind. First, make sure you give your preset a descriptive name that will help you remember what it does. For example, if your preset adds a warm, vintage look to your photos, you might name it “Vintage Warmth.”
Second, choose the appropriate folder to save your preset in. Lightroom comes with some default folders, such as “User Presets” and “Color Presets,” but you can create your own folders to keep your presets organized.
Tips for Creating Effective Presets
Creating effective presets is all about finding a balance between consistency and flexibility. You want your presets to be consistent enough to give your photos a cohesive look and feel, but flexible enough to work with a variety of photos.
Here are a few tips to keep in mind when creating presets:
- Start with a photo that represents the look and feel you want to achieve.
- Use a light touch when editing. You can always adjust the settings later if needed.
- Consider including a range of settings in your preset, such as exposure, contrast, and color adjustments.
- Test your preset on a variety of photos to make sure it works well in different lighting conditions and with different subjects.
By following these tips, you’ll be able to create presets that are both effective and flexible. Next, we’ll dive into exporting your presets so you can share your work with others.
Exporting Presets in Lightroom
Exporting your presets in Lightroom is a crucial step in sharing them with others or transferring them to a different computer. In this section, we’ll cover the reasons for exporting presets, how to export them, and where to save them.
Reasons for Exporting Presets
There are many reasons why you might want to export your presets in Lightroom. Perhaps you’ve created a set of presets that you want to share with a friend or colleague, or maybe you’re moving to a new computer and want to transfer your presets over. Whatever the reason, exporting your presets is a straightforward process that can save you time and effort in the long run.
Step-by-Step Guide on Exporting a Preset
Exporting a preset in Lightroom is a simple process that can be completed in just a few steps. Here’s how to do it:
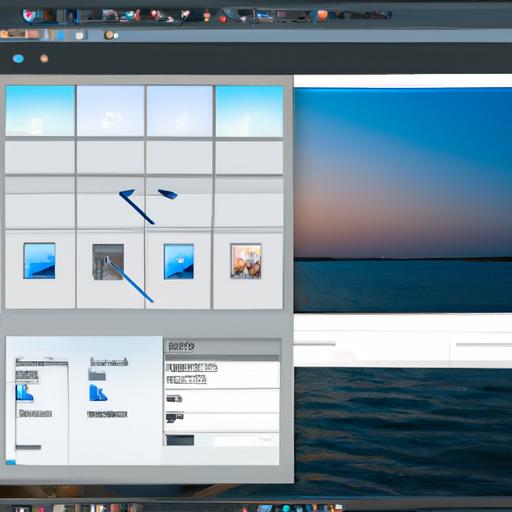
- Open Lightroom and navigate to the “Develop” module.
- Locate the preset you want to export in the “Presets” panel on the left-hand side of the screen.
- Right-click on the preset and select “Export…”
- Choose a location to save the preset and give it a descriptive name.
- Click “Export” to save the preset to your chosen location.
Saving Presets to a Specific Location
When exporting presets in Lightroom, it’s important to save them to a specific location that you’ll remember. You might want to create a folder on your desktop or in your documents specifically for Lightroom presets. This will make it easier to find your presets later and ensure that they don’t get lost in the shuffle.
By following these simple steps, you can easily export your presets in Lightroom and share them with others or transfer them to a different computer. Exporting your presets is an essential skill for any Lightroom user, and it’s one that can save you time and effort in the long run.
Sharing Presets with Others
Presets can be a powerful tool for photographers, and sharing them with others can be a great way to build your community and grow your skills. Here are some of the benefits of sharing presets:
Benefits of Sharing Presets
1. Community Building
Sharing your presets with others can be a great way to connect with other photographers and build your community. By sharing your work, you’re opening yourself up to feedback and collaboration, which can lead to new ideas and insights.
2. Branding
Sharing your presets can also be a great way to build your brand and establish yourself as an expert in your field. By creating and sharing high-quality presets, you’re showcasing your skills and demonstrating your expertise to others.
Ways to Share Presets with Others
There are many ways to share your presets with others, depending on your needs and preferences. Here are a few common methods:
1. Email
One of the easiest ways to share your presets is by emailing them to others. Simply export your preset and attach it to an email, then send it to your recipient. This method is quick and easy, but it can be less secure than other methods.
2. Cloud Storage
Another popular method for sharing presets is by using cloud storage services like Dropbox or Google Drive. Simply upload your preset to the cloud, then share the link with your recipient. This method is secure and easy to use, but it does require that both you and your recipient have access to the same cloud storage service.
Precautions when Sharing Presets
While sharing presets can be a great way to build your community and establish your brand, there are some precautions you should take when sharing your work. Here are a few things to keep in mind:
1. Copyright Infringement
Make sure that you have the right to share your presets with others. If you’re using someone else’s work as a base for your presets, make sure that you have the appropriate permissions and are not infringing on their copyright.
2. Security
Be aware of the security risks associated with sharing your work. Make sure that you’re using secure methods for sharing your presets and that you’re not putting yourself or your work at risk.
Conclusion
In conclusion, understanding how to export a preset in lightroom is an essential skill for any photographer. By following the step-by-step guide in this article, you can easily save, share, and backup your presets. Remember, presets can save you time and help you achieve a cohesive look and feel across your photos.
In addition to the basics of exporting presets, we also covered how to create and save presets, as well as how to share them with others. Sharing presets can be a great way to connect with other photographers and build a community around your work.
At NG Cloudy, we’re always looking for ways to help photographers take their work to the next level. Whether you’re just getting started or you’re a seasoned pro, our team of experts is here to help. We hope this guide has been helpful, and we look forward to seeing the amazing work you create with Lightroom presets!

