Are you tired of manually adjusting your photos in Lightroom every time you edit them? Lightroom presets can be a lifesaver, providing you with a quick and easy way to enhance your photos with just one click. However, what happens when you want to share your presets with others or use them on another device? This is where exporting Lightroom presets becomes crucial.
In this article, we’ll be discussing how to export lightroom presets, step-by-step. Whether you’re a professional photographer or just getting started with Lightroom, this guide will help you take your photo editing game to the next level.
But first, let’s start with the basics.
Understanding Lightroom Presets

Lightroom presets are pre-configured settings that adjust various elements of your photo, such as exposure, contrast, and saturation. They allow you to quickly apply a specific look or style to your images, saving you time and effort. There are two types of Lightroom presets: develop presets and export presets. Develop presets adjust the editing settings of your photo, while export presets determine how your images are exported.
Importance of Exporting Lightroom Presets

Exporting Lightroom presets is essential if you want to use them on another device or share them with others. By exporting your presets, you can easily transfer them to another computer or upload them to the internet for others to use. It also ensures that your presets are backed up, so you don’t have to worry about losing them if something happens to your computer.
Now that we’ve covered the basics let’s dive into the main topic of this article: how to export Lightroom presets.
Understanding Lightroom Presets
Lightroom presets are pre-configured settings that can be applied to your photos in just one click. They work by adjusting various elements of your photo, such as exposure, contrast, and saturation. This not only saves you time but also allows you to achieve a consistent look throughout your entire body of work.
Definition of Lightroom Presets
A Lightroom preset is a pre-configured setting that can be applied to one or more photos in a single click. It contains a specific combination of editing settings that can be saved and reused on other photos. This can save you time and effort, especially if you’re working on a large batch of photos.
Types of Lightroom Presets
There are two types of Lightroom presets: develop presets and export presets. Develop presets adjust the editing settings of your photo, while export presets determine how your images are exported.
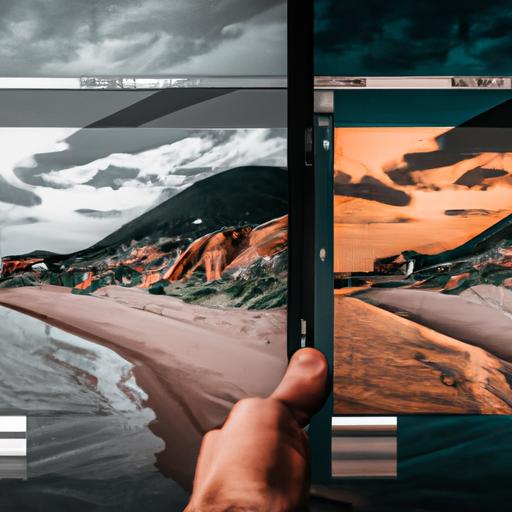
Develop presets are the most commonly used type of preset. They can adjust various elements of your photo, such as exposure, contrast, and saturation. They can also be used to create specific looks or styles, such as vintage or black and white.
Export presets, on the other hand, determine how your images are exported. This includes settings such as file format, resolution, and quality. By creating an export preset, you can quickly export your images in the exact format you need without having to manually adjust the settings for each photo.
Benefits of Using Lightroom Presets
Using Lightroom presets can offer a wide range of benefits, including:
- Saving time: Applying a preset to your photo can save you time and effort compared to manually adjusting each setting.
- Consistency: Presets can help you achieve a consistent look throughout your entire body of work.
- Creativity: Presets can inspire creativity and help you experiment with new styles and looks.
- Efficiency: Presets can help streamline your workflow, allowing you to focus on other aspects of your photography.
Now that you have a better understanding of Lightroom presets, let’s move on to the main topic of this article: how to export Lightroom presets.
Exporting Lightroom Presets
Exporting Lightroom presets is a straightforward process that can be done in just a few simple steps. Here’s a step-by-step guide to help you get started:
Step-by-Step Guide on How to Export Lightroom Presets
- Open Lightroom and select the presets you want to export from the Develop module.
- Right-click on the preset folder and select “Export”.
- Choose a location to save your presets. We suggest creating a new folder specifically for your exported presets to keep them organized.
- Select the file format for your presets. The two most common file formats are .xmp and .lrtemplate.
- Click “Export” to save your presets.
Different Ways to Export Lightroom Presets
There are a few different ways to export Lightroom presets, depending on your needs. The most common way is to export presets directly from the Develop module, as outlined in the step-by-step guide above. However, you can also export presets from the Preset panel, the Quick Develop panel, or the Export dialog bo
Tips on How to Export Lightroom Presets Effectively
Exporting Lightroom presets is a simple process, but there are a few things you can do to make it more efficient:
- Keep your presets organized: Create specific folders for different types of presets to avoid confusion and make it easier to find what you need.
- Be consistent: Use the same file format for all your presets to avoid compatibility issues.
- Back up your presets: Make sure to regularly backup your presets to avoid losing them if something happens to your computer.
- Share your presets: Exporting your presets can be a great way to share your editing style with others. Consider uploading them to the internet or sharing them with friends and colleagues.
By following these tips, you can ensure that exporting your Lightroom presets is a hassle-free process that saves you time and effort in the long run.
Importing Lightroom Presets
Importing Lightroom presets is just as important as exporting them, especially if you want to use presets created by someone else or on another device. Let’s take a look at the process of importing Lightroom presets, step-by-step.
Understanding the Process of Importing Lightroom Presets
Before you start importing Lightroom presets, it’s essential to understand the process. When you import a preset, it will be added to the Develop Presets folder in the Lightroom application folder. This folder contains all the presets that are available in Lightroom.
How to Import Lightroom Presets
Now, let’s get into how to import Lightroom presets. Follow these simple steps:
- Open Lightroom and go to the Develop module.
- Click on the “+” icon in the Presets panel.
- Select “Import Presets” from the drop-down menu.
- Navigate to the location where your presets are saved and select them.
- Click “Import” to add the presets to Lightroom.
That’s it! Your imported presets will now appear in the Presets panel in the Develop module.
Troubleshooting Common Issues When Importing Lightroom Presets
Sometimes, importing Lightroom presets can be a bit tricky, and you may encounter some issues. Here are some common problems and how to troubleshoot them:
- Presets not appearing in Lightroom: This can happen if the presets are not saved in the correct format or location. Make sure your presets are saved in the .lrtemplate or .xmp format and are located in the correct folder.
- Presets not working correctly: If your presets are not working as expected, it could be due to a conflict with other presets or settings. Try resetting your Lightroom preferences or removing any conflicting presets.
- Presets missing after Lightroom update: If you’ve updated Lightroom, your presets may not appear. Try re-importing them or checking if they’re still in the correct location.
By following these troubleshooting tips, you’ll be able to quickly resolve any issues and start using your imported presets in Lightroom.
How to Use Lightroom Presets
Now that you know how to export Lightroom presets, let’s discuss how to use them effectively to enhance your photos.
Step-by-Step Guide on How to Use Lightroom Presets
- Open Lightroom and import your photo.
- Navigate to the Develop module.
- On the left-hand side, you will see the Presets panel. Click the small plus (+) sign to create a new preset folder.
- Name your preset folder and click create.
- Select the photo you want to edit and choose the preset you want to apply from the Presets panel.
- Voila! Your photo will be automatically edited according to the settings in the preset.
Tips on How to Use Lightroom Presets Effectively
- Experiment with different presets to find the ones that work best for your style.
- Adjust the preset settings to fit your image if needed. Presets are not one-size-fits-all, so don’t be afraid to make changes.
- Use presets as a starting point and make additional adjustments to fine-tune your photo.
- Save frequently used presets as favorites for easy access.
How to Customize Lightroom Presets to Fit Your Style
If you find that your favorite preset doesn’t quite fit your style, don’t worry. You can customize presets to fit your needs. Here are some tips on how to do it:
- Adjust the Exposure, Contrast, Highlights, Shadows, Whites, and Blacks sliders to fine-tune the preset.
- Use the HSL/Color panel to adjust the colors in your image.
- Use the Tone Curve panel to adjust the brightness and contrast of your image.
- Use the Sharpening and Noise Reduction panels to adjust the sharpness and noise in your image.
By following these tips and tricks, you can make the most out of your Lightroom presets and take your photo editing game to the next level.
Conclusion
In conclusion, exporting Lightroom presets is a crucial step for any photographer looking to streamline their editing process. By following the step-by-step guide outlined in this article, you can easily export your presets and use them on any device or share them with others.
Remember to always back up your presets and keep them organized for easy access. Don’t be afraid to experiment with different presets and customize them to fit your unique style.
At Ngcloudy.com, we understand the importance of efficient and effective photo editing. That’s why we offer a wide range of resources and tutorials to help you take your photography skills to the next level. Visit our website today to learn more and start creating stunning images with ease.

